V-1HD: How to Adjust Audio Delay
On the V-1HD, you can add a delay to the audio input signals to synchronize audio with video. When running separate audio and video signals, some cameras may have video processing latency that causes the video signal to arrive later than the audio signal.
This can also occur with embedded audio, for example, running a wireless mic directly into the camera.
On the V-1HD, audio delays can be applied to all analog audio inputs and digital embedded input audio.
This guide covers the V-1HD's on screen menu on the HDMI Preview output. You can also adjust these settings using the V-1HD RCS Software.
If you need to adjust the delay of a video signal because you have different camera models in the same workflow and they have a noticeable difference in latency, you will need to insert a converter like our VC-1-DL between the camera's output and V-1HD's input.
Setting the Delay Amount
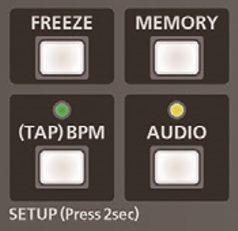
1. On the V-1HD hardware panel, press [ AUDIO ] button, followed by the [ TRANSFORMER DOWN ] until you get to Page 2.
Note: With System Software version 2.0 or later, you can use the [ MIX ] and [ CUT ] buttons to quickly navigate menu pages.


The delay settings for each audio source are on the last line of menu pages 2 through 7. There are two pages in this sub-menu; the second page contains all the embedded input audio sources.
HDMI IN 1-4 - Page (2-5/ 12)
AUDIO IN - Page (6/ 12)
MIC IN - Page (7/ 12)
2. Select [ DELAY ], and use the transition slider to change the delay value.
3. The new setting is automatically applied.
4. Press the [ AUDIO ] button to exit the menu.
The values range from 0.0 to 500.0 milliseconds, in 0.1 increments.
How to Measure the Delay
1. With your switcher already set up in its production workflow, make a test recording of a hand clap or production slate in front of the cameras and microphones.
2. Open the recording in video editing software, un-link the audio tracks and video track, and adjust the audio track until it is in sync with the video.
3. Measure the sync offset by counting the number of milliseconds or frames that you adjusted the audio track, and apply that setting to the associated V-1HD input by following the steps in the previous section of this guide.
Please Note: If the sync offset is only measured in frames in your video editing software, you will need to convert to milliseconds.
If working with 720P or 1080P, there are 59.94 frames per second. 1080i signals are actually 29.97 frames per second (59.94 interlaced fields).
To calculate the offset, divide 1000 (milliseconds) by the number of frames (either 29.97 or 59.94), and multiple by the frame offset. This will give you the offset, in milliseconds.
Example 1: 1000 / 59.94 = 16.68 x 4 = 66.7 ms
Example 2: 1000 / 29.97 = 33.37 x 4 = 133.5 ms
4. Make another test recording to confirm the changes synchronize the audio and video.
More Information
For more information about audio effects, refer to the V-1HD Owner's Manual.
Note: This is a separate document from the RCS Owner's Manual and Remote Manual.
