
VR-120HD: Quickstart Guide
This article contains links and information to help you get started with the VR-120HD.
For additional support, please submit a ticket at roland.com/backstage
Quickstart Topics:
Click on a topic to jump to that section
icons link to videos for that topic
PRODUCT VIDEOS
Video Manual Tutorial
Introduction Video
INSTRUCTION MANUALS
Startup Guide - Covers connecting equipment and general information.
- This is a PDF copy of the manual of the box.
Reference Manual - Contains detailed walkthroughs for every feature and menu setting.
- This manual is PDF only.
FIRMWARE UPDATES
The latest system program firmware version for VR-120HD is version 1.13:
- Go to: MENU > SYSTEM > VERSION
If it is an earlier version, use this update guide.
CHOOSING CAMERAS
These guides help you choose the best type of camera for your workflow, set it up to output a compatible video resolution, and also output video without menu overlays or screen information.
- Roland Switchers: How to Choose a Camera for Live Video
- Roland Switchers: How to Setup Clean HDMI Output on your Camera
VIDEO FORMATS
These are the rules that video sources follow when connected to the VR-120HD. There are two settings in the System menu, System Format (aka resolution) and Frame Rate. The default video format is 1080p 59.94 Hz and recommended for most workflows.
MENU > SYSTEM > OUTPUT FORMAT > SYSTEM FORMAT
-
1080p - HDMI and SDI inputs and outputs can be a mix of 1080i and 1080p
- USB and LAN outputs can be a mix of 1080p and 720p
-
720p - All inputs and outputs are 720p
- Including USB and LAN
-
- HDMI inputs 1-6 are multi-format, they convert the source's resolution to match the System Format setting.
- SDI inputs 1-6 need their resolution (but not scan type) to match the System Format setting.
MENU > SYSTEM > FRAME RATE
-
23.98, 24, 25, 29.97, 30, 50, 59.94, 60 - All HDMI and SDI outputs match the Frame Rate setting.
- All HDMI and SDI inputs convert the source's frame rate to match the Frame Rate setting.
-
- The 720p System Format and 720p USB Stream output do not support native 25, 29.97, or 30 Hz output.
- If the Frame Rate setting is 50/59.94/60, you can halve it to 25/29.97/30.
- Menu > System > Frame Rate - USB Out
- Menu > System > Frame Rate - Stream/Record
- You can double the frame rate of the Direct Streaming Output from 25/29.97/30 to 50/59.94/60 by disabling the video player.
- If you don't, you will see the message "Resource Error" when you start a stream or recording.
- Menu > Video Player > Jump to Setup > tap the Stop button
- Menu > System > Frame Rate - Stream/Record
- If you don't, you will see the message "Resource Error" when you start a stream or recording.
The following chart lists input and output combinations with different video formats:
|
480i/480P 576i/576P |
720P | 1080i | 1080P | XGA | |
|
23.98 24 |
N/A | N/A | N/A |
SDI HDMI USB & LAN OUT |
N/A |
| 25 | LAN OUT | ||||
|
29.97 30 |
HDMI IN |
LAN OUT | |||
| 50 |
SDI HDMI USB & LAN OUT |
SDI HDMI |
|||
|
59.94 60 |
HDMI IN (60 Hz) |
If using 1080p, the SDI video signal is "3G" and there are 2 "Levels", A and B. If you experience compatibility issues with your SDI output, you can change the Level in MENU > VIDEO OUTPUT > SDI OUT 1/2/3 > 3G-SDI MAPPING.
-
VR-120HD: Setting the Video Input/Output Format
(Reference Manual, page 14)
AUDIO SETUP
When you first turn on the VR-120HD, it is set to mix all XLR, RCA, and embedded input audio at their current levels and output the mix via the HDMI, SDI, LAN, and USB Stream outputs. You can adjust the levels using either the physical faders or the touchscreen.
You can also assign any audio source to any physical fader, press that fader's Setup button, and select a different source from the drop-down menu along the top of the touchscreen.
If you are using the USB Streaming Output, make sure that both the Main Fader, USB Out knob, and Stream/Record knobs are turned up to 0 dB.
- VR-120HD: How to Set Up Audio (Coming Soon)
-
VR-120HD: Audio Operations
(Reference Manual, page 43)
CONNECTING LAPTOPS
On your PC or Mac, there are two ways to set up the computer's HDMI output to your VR-120HD: Duplicate and Extend.
- Duplicate creates a copy of your Desktop, including your Taskbar or Dock. Your mouse will appear on both screens.
- Extend creates a clean desktop, and you can move your mouse between the two.
These guides walk you through general setup in Windows 10 and MacOS:
- Roland Switchers: How to Set Up a Windows PC as a Presentation Source
- Roland Switchers: How to Set Up a Mac as a Presentation Source
If you use software that generates visuals or plays media files, there may be additional screen output settings in the software:
- EasyWorship: Screen Setup
- NewBlue: Output Graphics with HDMI
- PowerPoint: Present on Multiple Monitors
- ProPresenter: Screen Configuration
- Resolume: Output Setup
AEROCASTER SWITCHER
The VR-120HD gives you free access to Roland’s AeroCaster Switcher for iPad. With this app, you can wirelessly connect and switch up to five sources (phone cameras, tablet cameras, laptop webcams, and laptop browser tabs), then output a combined program feed to an HDMI input on the VR-120HD.
AeroCaster Switcher Product Page
ADDING LIVE GRAPHICS
You can overlay graphics like lower thirds and logos using the DSK or Picture in Picture functions, which use keyers to remove a solid color or the alpha channel from an overlay source.
Here are the available keyer types:
PinP 1-4: Luma, Chroma
DSK 1-2: Luma, Chroma, Alpha (PNG only), External (Key and Fill sources)
-
VR-120HD: How to Set Up and Use Picture in Picture Overlays
(Reference Manual, page 34) -
VR-120HD: Set Up Titles or a Green Screen with the DSK (Downstream Keyer)
(Reference Manual, page 36)
- Roland Switchers: How to Set Up PowerPoint for Chroma Key Graphics
- Roland Switchers: Tips to Improve Text Readability with Luma Key
ADDING STILL IMAGES
You can import up to 16 still images using the Capture Image function, which creates a still image from any video input, or import them using a flash drive and the USB Memory port.
- A 16 GB or smaller USB Flash Drive is recommended
- Larger drives may not format or function
- SD card adapters and hard drives are not compatible
- The Format setting in the menu will format the USB Flash Drive as "FAT32"
- You can also format it using your computer, but using the menu is recommended
Here are the recommended settings to import a still image via USB:
| Format |
Bitmap (.bmp), 24-bit color, uncompressed PNG (.png), 24-bit color + 8-bit alpha channel * Alpha channel supported with DSK JPEG (.jpg & .jpeg), 24-bit color |
| Resolution |
Matches the System Format: 720P = 1280x720 1080i/1080P = 1920x1080 |
| File Name |
No more than 64 single-byte alphanumeric characters * Add the extension ".bmp", ".png", ".jpg", or ".jpeg" |
-
VR-120HD: How to Capture, Import, and Use Still Images
(Reference Manual, page 26) - Roland Switchers: Resolution vs. Dimensions with Still Images
STREAMING VIDEO
The VR-120HD uses either the LAN Direct Stream or USB Stream port for livestreaming. LAN Direct Stream allows you to connect the VR-120HD directly to your network and stream to any platform that supports RTMP, without using a computer.
- What is RTMP? Ever notice how a website link sometimes starts with the letters HTTP? RTMP is like the streaming version of that.
If you want to use VR-120HD with videoconferencing software like Zoom or Teams, use the USB Stream output.
The LAN Direct Stream port on the back of the VR-120HD can:
- Stream video and audio without a computer
- Use for Facebook, YouTube, etc.
- Connect to the RCS software iPad Remote app (Future Update)
- The Remote app also supports Bluetooth connections
- Control the VR-120HD externally
The USB-C Stream port on the back of the VR-120HD can:
- Stream video and audio using a computer
- Use for Zoom, Teams, etc.
- Connect to the RCS software iPad Remote app (Future Update)
The USB Type A port on the front of the VR-120HD can:
- Import still images
- Backup and restore settings
- Update the firmware
USB Streaming Setup Guides
A USB-C cable is not included. The following cables are recommended:
If you use Zoom or Teams with a recommended cable and you notice any issues with the video quality, please use this guide to change your USB output setting:
If you have any issues with your USB signal, this guide helps you troubleshoot the connection:
Streaming Software Guides
Windows
-
Roland Live Streamer: How to Set Up and Use this Free Software to Stream
- Facebook, YouTube, Twitch, etc.
- Compatible with Windows 10/11 and Roland streaming hardware
- Requires Intel i5 or higher with Quick Sync, i3 and Celeron may not work
- AMD processors are not compatible
Windows and Mac
-
Roland Switchers: How to Customize Live Streams With OBS
- Facebook, YouTube, Twitch, etc.
- Compatible with Windows, Mac, and all capture devices
-
Roland Switchers: How to Stream to Zoom Directly
- Compatible with Windows, Mac, and all capture devices
Direct Streaming Setup Guides
You can also log in directly to YouTube, Facebook Live, and Twitch, the VR-120HD will give you a short URL to enter in a web browser to complete the connection.
- How to Stream to Facebook with the "Use Web App" Setting
- How to Stream to YouTube with the "Use Web App" Setting
- How to Stream to Twitch with the "Use Web App" Setting
- How to Stream to any platform with the "Use Web App" Setting
The following list contains important information on streaming platforms. This information is subject to change at any time. Please refer to the platform's support articles for the latest information.
Services that Support Direct Login
Facebook Live: There are no account restrictions for 30 FPS streams and you can stream to your Timeline, Pages, or Groups either publicly or privately.
- Requirements for Facebook Live videos
- About HD streaming on Facebook Gaming
- How to join the Facebook Gaming Level Up program
Twitch: There are no account restrictions, but private and test streams are not possible, all streams are public.
YouTube: There are account requirements before you can stream directly via login, most require no action from you.
- Most importantly, you have to verify your channel using a mobile phone number and wait up to 24 hours, using this link: youtube.com/verify
These are the requirements, please click here for more information. Note that these are YouTube's requirements and are subject to change at any time:
- Restricted Streaming: Requires 50 followers, no account restrictions in the last 90 days, a verified channel (requires a mobile phone number), and up to a 24 hour waiting period for mobile streaming. There is a limit on viewers (number of followers +25) and archived streams default to private.
- Unrestricted Streaming: In addition to the above requirements it requires 1000 followers and the waiting period may be longer than 24 hours for mobile streaming without restrictions.
-
If you do not meet these requirements: You can connect by setting up Custom RTMP in the menu.
- Log into your YouTube account in a web browser, enter YouTube Studio, and look for the RTMP URL and Stream Key.
Services that Support Custom RTMP
For all other services, set them up as a Custom RTMP in the menu.
Some services listed below may require a paid monthly subscription and some do not support streaming outside of their dedicated mobile app, please see below for additional details.
The following information is subject to change at any time. Please refer to the platform's support articles for the latest information.
BoxCast: Set up as a Custom RTMP service.
More information is in this guide.
Crowdcast: Set up a Custom RTMP service.
More information on Crowdcast's RTMP Studio is in this guide.
Dacast: Set up a Custom RTMP service.
More information is in this guide.
Instagram: Instagram now provides RTMP information to set up a Custom RTMP service.
More information is in this guide.
LinkedIn: There are account requirements before you can stream. You will need 150 followers or connections, a history of posting original content, and no community guideline violations.
Once your account is activated for streaming, set up a Custom RTMP service.
More information in this guide.
Patreon: This platform uses Crowdcast, please scroll up for more information.
Restream: Set up a Custom RTMP service.
More information in this guide.
If you want to stream AeroCaster to Restream Studio, you need a company plan.
More information in this guide.
Snapchat: This platform does not appear to support livestreaming at this time.
TikTok: There are account requirements before you can start a stream with the TikTok app. There may be additional requirements to get a RTMP URL and Stream Key.
Direct mobile streaming from outside the TikTok app is not supported, but you can set up a Custom RTMP service by setting up the stream in the TikTok app to get the RTMP URL and Stream Key.
Twitter: Set up a Custom RTMP service.
More information on Twitter's Media Studio Producer in this guide.
Vimeo: Set up a Custom RTMP service.
More information is in this guide.
RECORDING VIDEO
You can record the following at the same time to the SD card on the VR-120HD.
- MP4 files containing a single video and audio bus
- WAV files containing a single audio bus
- Video Bus Options: Program, Sub Program, Preview, AUX, Multi-View, Input-View, Still-View
- Menu > Video Assign > Jump To Setup > Output tab
- Audio Bus Options: Main Bus, AUX 1 Bus, AUX 2 Bus
- Menu > Audio Output > Output Assign > Jump to Setup
- Menu > Audio Output > Output Assign > Jump to Setup
- Video Bus Options: Program, Sub Program, Preview, AUX, Multi-View, Input-View, Still-View
-
VR-120HD: Audio and Video Recording
(Reference Manual, page 60)
An SDXC card is not included. The following cards are recommended:
You can also record the VR-120HD's USB streaming output with software that can record UVC video.
A USB-C cable is not included. The following cables are recommended:
Additionally, the VR-120HD has a Record Control function that will start and stop recording via HDMI with compatible external recorders.
-
VR-120HD: How to Start and Stop External Recording with the User Buttons
(Reference Manual, page TBD) - List of Compatible Recorders
Here are some software guides:
Windows
-
Roland Live Recorder: How to Set Up and Use this Free Software to Record Video
- Compatible with Windows 10/11 and Roland streaming hardware
- Requires Intel i5 or higher with Quick Sync, i3 and Celeron may not work
- AMD processors are not compatible
- Compatible with Windows 10/11 and Roland streaming hardware
Windows and Mac
-
Roland Video Capture for VR
- Compatible with Windows, Mac (Intel & M1), and all capture devices
- Roland Switchers: M1 Mac Compatibility Information
SOFTWARE CONTROL
There is free control software for the VR-120HD:
If it does not connect, update your firmware to the latest version.
To connect the VR-120HD to the RCS software, you can use either:
-
USB
- Fully wired control, requires the following:
- USB Type C to Type A cable
- Note that you can still use the USB Streaming port for streaming and recording while using the RCS software
- USB Type C to Type A cable
- Fully wired control, requires the following:
-
LAN
- Wired VR-120HD and computer via Ethernet
- Create a 4-digit network password in the LAN Control menu to use this feature
- Wired VR-120HD and computer via Ethernet
-
RS-232
- Wired VR-120HD and computer via RS-232
- Note that the VR-120HD has a 9-pin RS-232 port
- Wired VR-120HD and computer via RS-232
To connect the VR-120HD to the Remote app, you can use either:
-
Bluetooth
- Fully wireless control
-
LAN
- Wired VR-120HD via Ethernet
- Create a 4-digit network password in the LAN Control menu to use this feature
- Wireless iPad
- Wired VR-120HD via Ethernet
-
USB
- Fully wired control, requires the following:
- USB Type C to Type A cable
- Apple Lightning to USB Camera Adapter
- Apple MK0W2AM/A or MD821AM/A
- Note that if you have an iPad Pro with a USB-C connector, you do not need the adapter, and can use a USB-C (Type C to Type C) cable instead
- Fully wired control, requires the following:
CONTROL SYSTEMS
Information about remote control connections and commands will be available with a future update.
PTZ CAMERA CONTROL
You can control up to 16 PTZ cameras over a network using the VR-120HD's touchscreen.
- Menu > Camera Control > Jump to Setup
Before you can control any cameras, you need to set up your VR-120HD's network settings in the LAN Control menu.
- Menu > LAN Control > LAN Setup
Compatible PTZ brands include: Avonic, Canon, JVC, Panasonic, PTZ Optics, and Sony.
- Sony cameras use the "VISCA Over IP" protocol.
- Other brands may work with the "VISCA Over IP" protocol, but are not officially supported.
- Supports PTZ control only over IP.
- RS-232 and RS-422 cameras are not compatible.
-
VR-120HD: How to Set Up and Control PTZ Cameras
(Reference Manual, page 87) - VR-120HD: List Of Compatible Cameras For LAN Control
- How To Setup Your IP Address For Pro AV Products With LAN Control
- Roland Switchers: LAN and RS-232 Control Tips and Documentation
FOOT SWITCH CONTROL
The VR-120HD supports control from up to 2 BOSS foot switch controllers:
You can set them up in the CTL/EXP menu.
-
MENU > CTL/EXP > CTL/EXP 1/2 > CTL/EXP TYPE
- Select CTL A & CTL B for foot switch controllers
- The FS-5U only uses the command assigned to CTL B
- Select EXP for expression pedals
- Select CTL A & CTL B for foot switch controllers
-
VR-120HD: How To Setup A Footswitch Controller
(Reference Manual, page 89)
PROTECTING SETTINGS
There are multiple ways to protect your settings on the VR-120HD:
- Store settings as a Scene Memory
- Enable Memory Protect in the Scene Memory menu
- Customize what is recalled by presets in the Load Parameter submenu
- Backup all settings using the USB Memory Port
- Enable Panel Lock for some of the physical controls
HDCP TROUBLESHOOTING
The VR-120HD supports many video source devices, but DVD/Blu-Ray players and Streaming Boxes require HDCP (High-bandwidth Digital Content Protection) to be turned on in the system settings. Once enabled, the signal will pass through.
But there are exceptions. If the VR-120HD's HDMI output is connected to a recording or streaming device, or a converter that outputs SDI or Analog video, that device will block the DVD/Blu-Ray player's HDCP copy-protected signal passing through the switcher.
So long as the only destination devices are displays or projectors, then you should not have any issues with enabling HDCP.
On the VR-120HD, turning on HDCP will also disable the SDI, LAN, and USB streaming outputs.
HDMI CAT Extenders: These are a pair of converters that extend an HDMI signal by converting it to Ethernet and back to HDMI again. These extenders may add HDCP to the signal, even if the source is a camera. Please check with the extender's manufacturer regarding compatibility. SDI converters or HDBaseT extenders are recommended as they do not add or require HDCP.
Game Consoles: These may have HDCP enabled by default for all games and content, or just for streaming services and disc playback. If you want to stream or record the Roland's output, then HDCP needs to be disabled on both the game console and the Roland. Consoles either do this automatically or have a menu setting. Check your game console's manual for more information.
-
VR-120HD: How to Input Copy-Protected (HDCP) Video
(Reference Manual, page 18)
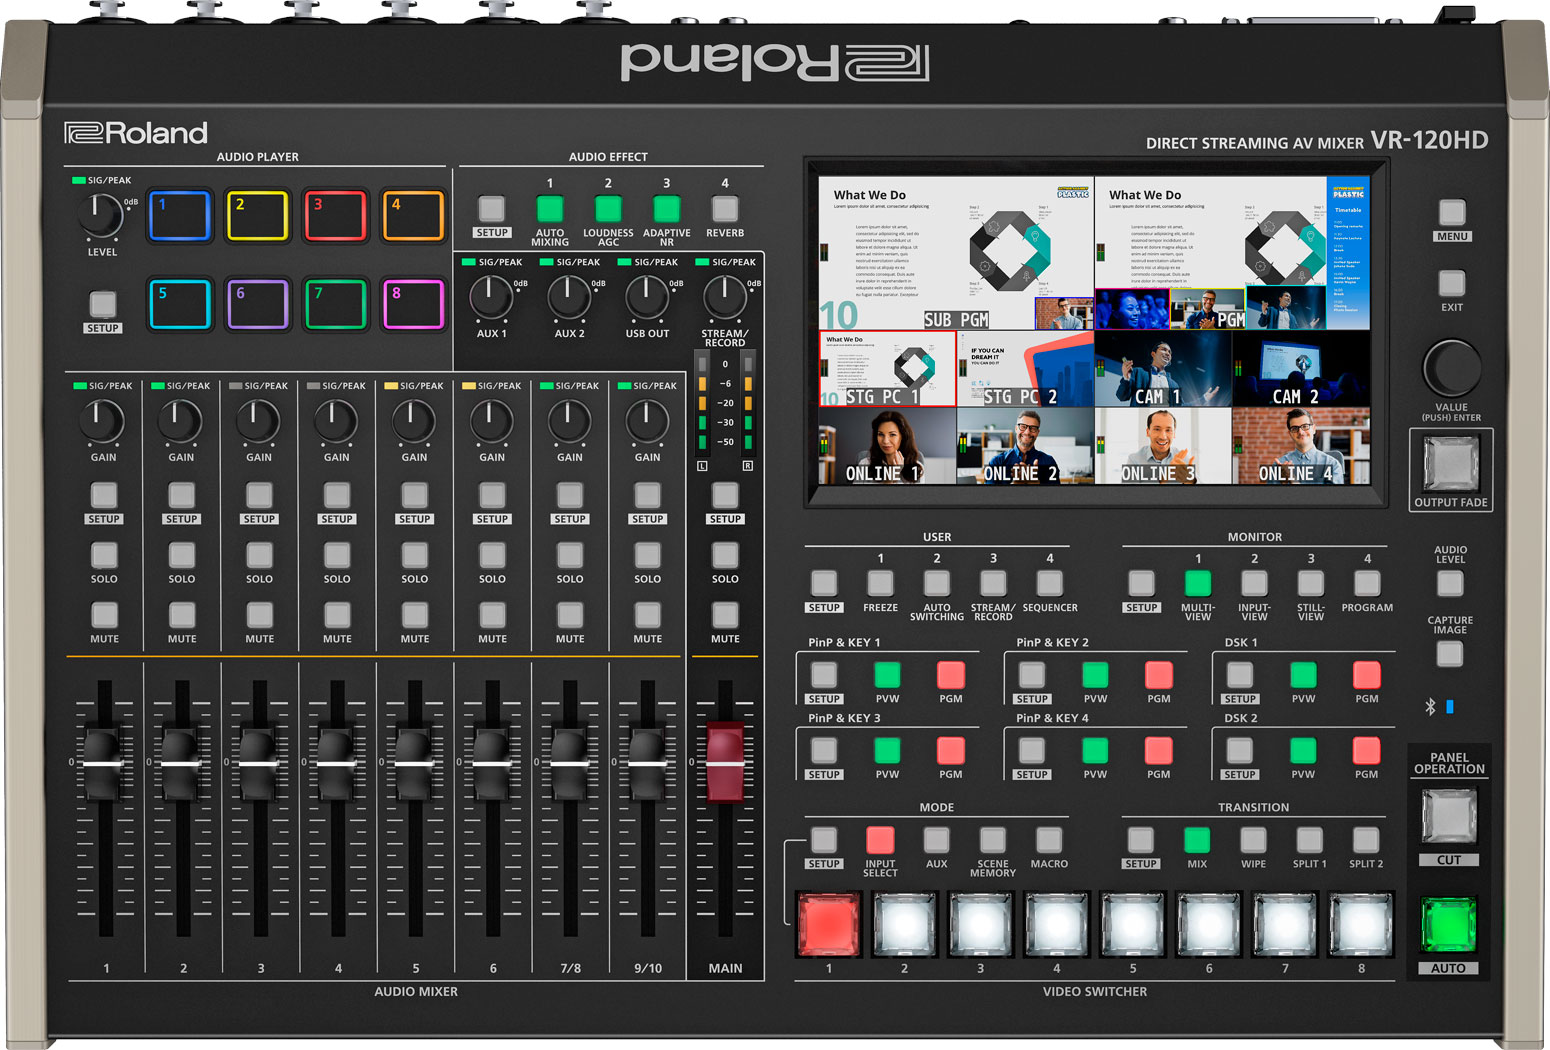
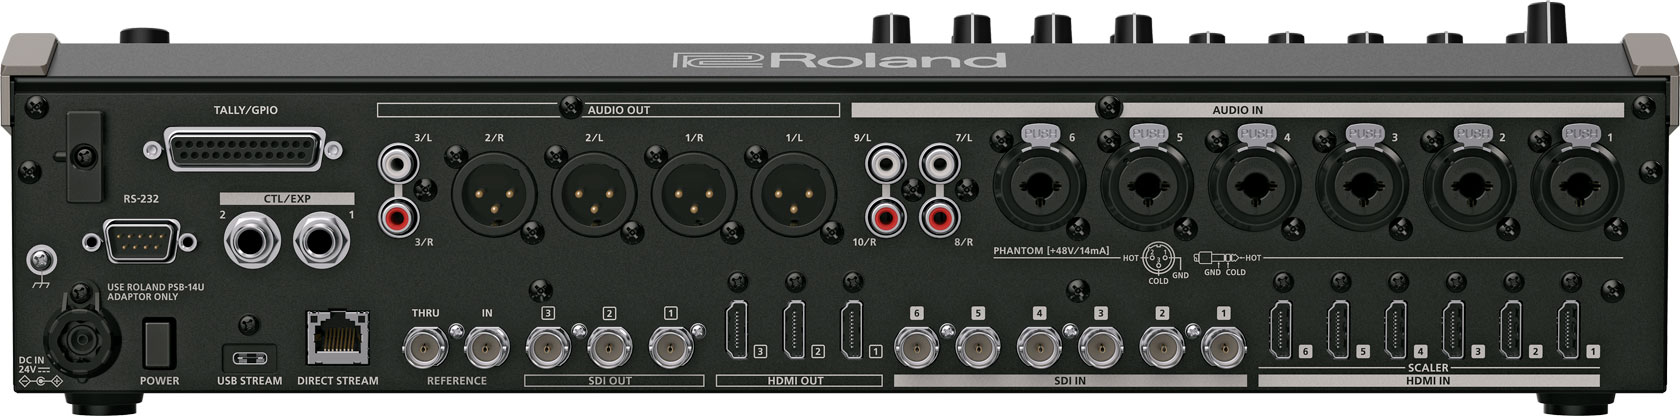
PRODUCT IMAGES
Click each image for a larger version:
ADDITIONAL LINKS
-
VR-120HD Product Page
- Introduction, Overview, Detailed Product Photos, etc.
-
VR-120HD Specifications
- Detailed Hardware Specifications
-
VR-120HD Downloads
- System Software Update, Streaming/Recording Software
-
VR-120HD Manuals
- Owner's Manual, Reference Manual, Remote App Manual, etc.
-
Knowledge Base: VR-120HD
- Additional Support Articles