A PHP Error was encountered

Severity: Notice

Message: Undefined index: HTTP_ACCEPT_LANGUAGE

Filename: core/MY_Controller.php

Line Number: 178

A PHP Error was encountered

Severity: Warning

Message: array_key_exists(): The first argument should be either a string or an integer

Filename: core/MY_Controller.php

Line Number: 181

A PHP Error was encountered

Severity: Notice

Message: Undefined index: HTTP_ACCEPT_LANGUAGE

Filename: core/MY_Controller.php

Line Number: 185

A PHP Error was encountered

Severity: Warning

Message: array_key_exists(): The first argument should be either a string or an integer

Filename: core/MY_Controller.php

Line Number: 188

A PHP Error was encountered

Severity: Notice

Message: Undefined index: /support/knowledge_base/

Filename: controllers/knowledge_base.php

Line Number: 89

A PHP Error was encountered

Severity: Notice

Message: Trying to get property of non-object

Filename: controllers/knowledge_base.php

Line Number: 94

A PHP Error was encountered

Severity: Notice

Message: Trying to get property of non-object

Filename: controllers/knowledge_base.php

Line Number: 95

A PHP Error was encountered

Severity: Notice

Message: Trying to get property of non-object

Filename: controllers/knowledge_base.php

Line Number: 96

A PHP Error was encountered

Severity: Warning

Message: curl_setopt(): CURLOPT_FOLLOWLOCATION cannot be activated when safe_mode is enabled or an open_basedir is set

Filename: models/zd_model.php

Line Number: 38

A PHP Error was encountered

Severity: Notice

Message: Trying to get property of non-object

Filename: controllers/knowledge_base.php

Line Number: 108

A PHP Error was encountered

Severity: Notice

Message: Trying to get property of non-object

Filename: controllers/knowledge_base.php

Line Number: 109

欢迎访问Roland ProAV中文网站 - 支持 - - M-200i: How to Setup an AUX Send for Monitoring or Broadcast
AS

M-200i: How to Setup an AUX Send for Monitoring or Broadcast

The following article will guide through setting up an AUX send for sending to a monitor/wedge or a broadcast mix.

The example below will use AUX 1 and the physical output 1 of a S-1068 snake box connected to the M-200i's REAC port. However, this example can be used on any connected Roland snake box or the M-200i's console outputs.
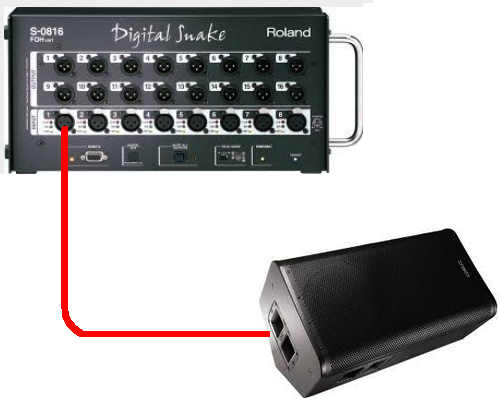
AUDIO CONNECTION

  1. Connect the M-200i's REAC port to the REAC port of the Roland digital snake.
  2. Connect the audio output 1 from the snake box to the amp/powered speaker or the broadcast mix input (e.g. an audio interface connected to a computer).

M-200i SETTINGS

Patchbay Setting:

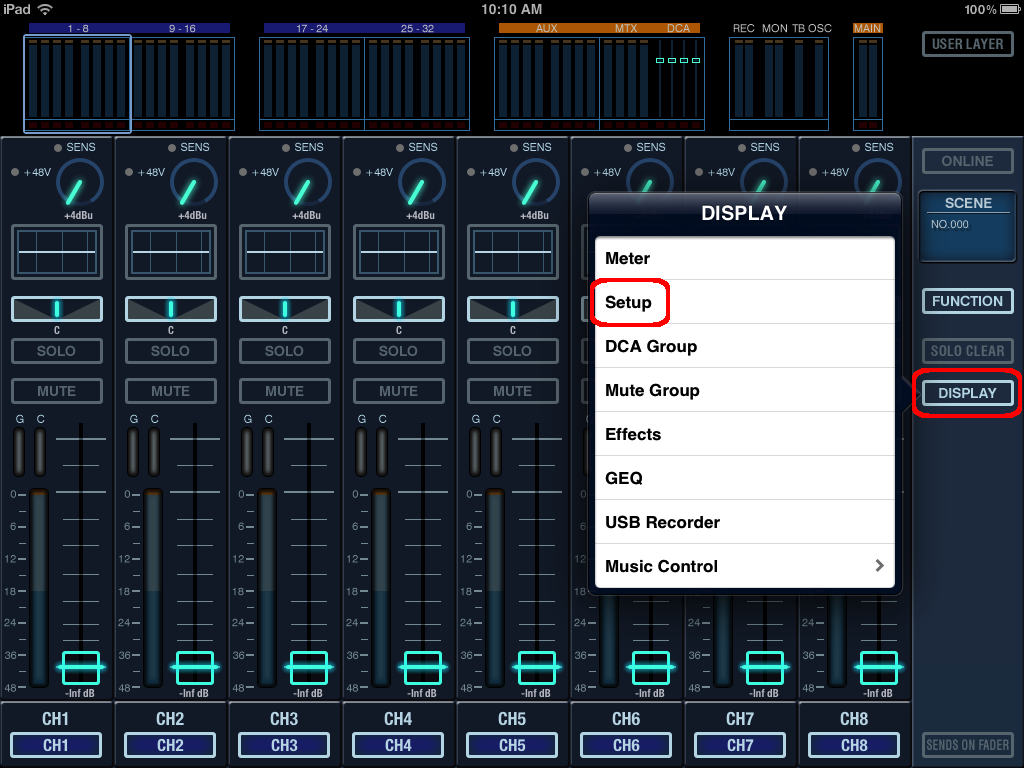
  1. Tap the DISPLAY button and select Setup.
    IMG_0005.PNG
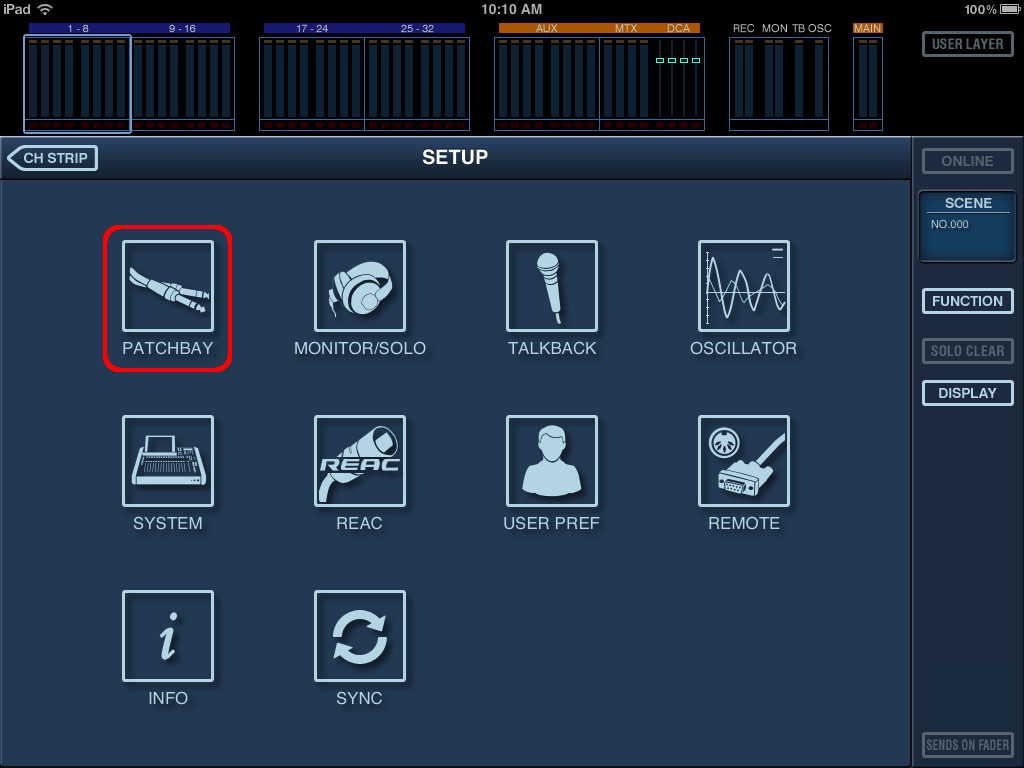
  2. Tap the PATCHBAY button.
    IMG_0006.PNG
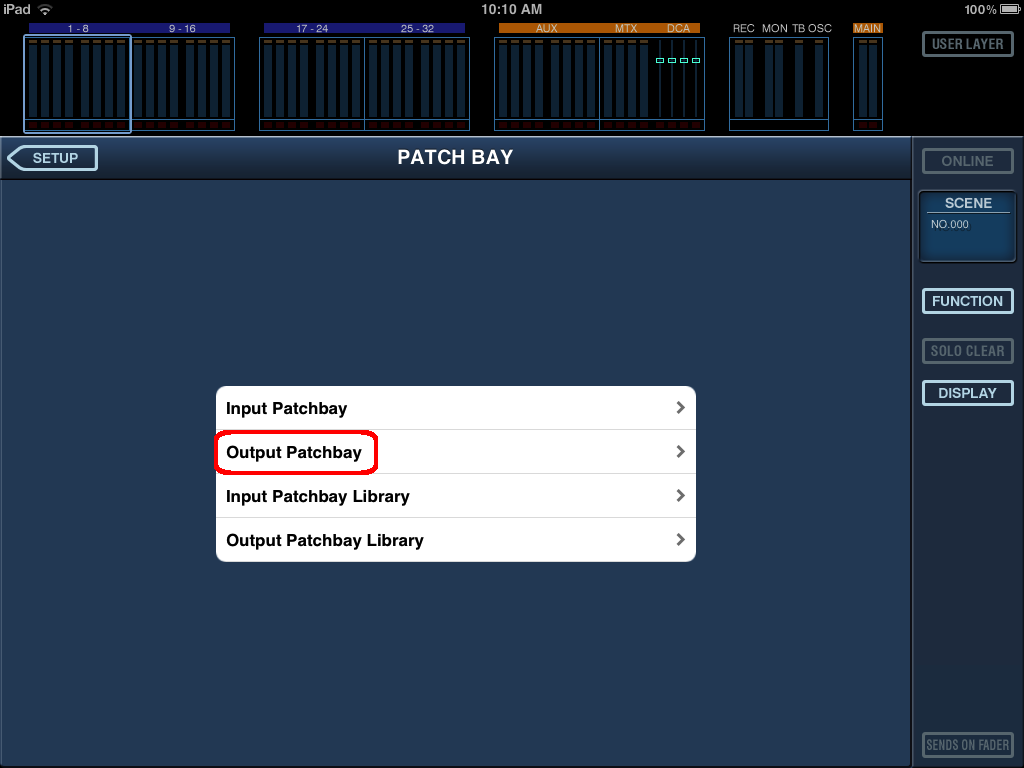
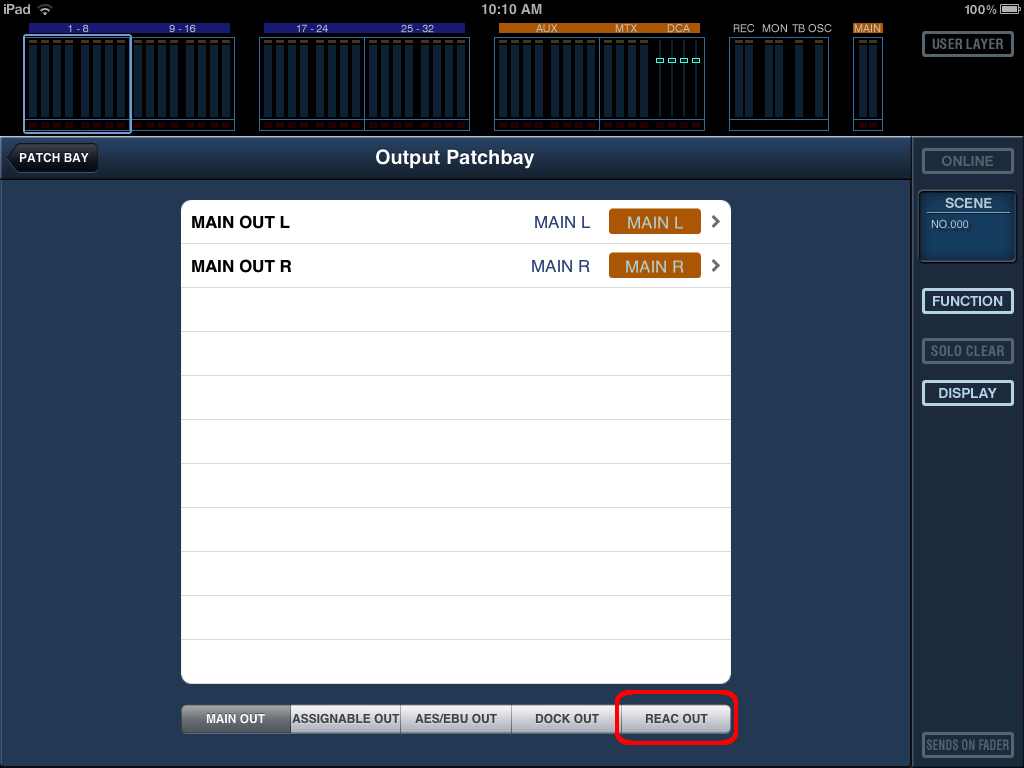
  3. Tap the Output Patchbay button.
    IMG_0007.PNG
  4. Tap the REAC OUT button.
    IMG_0008.PNG
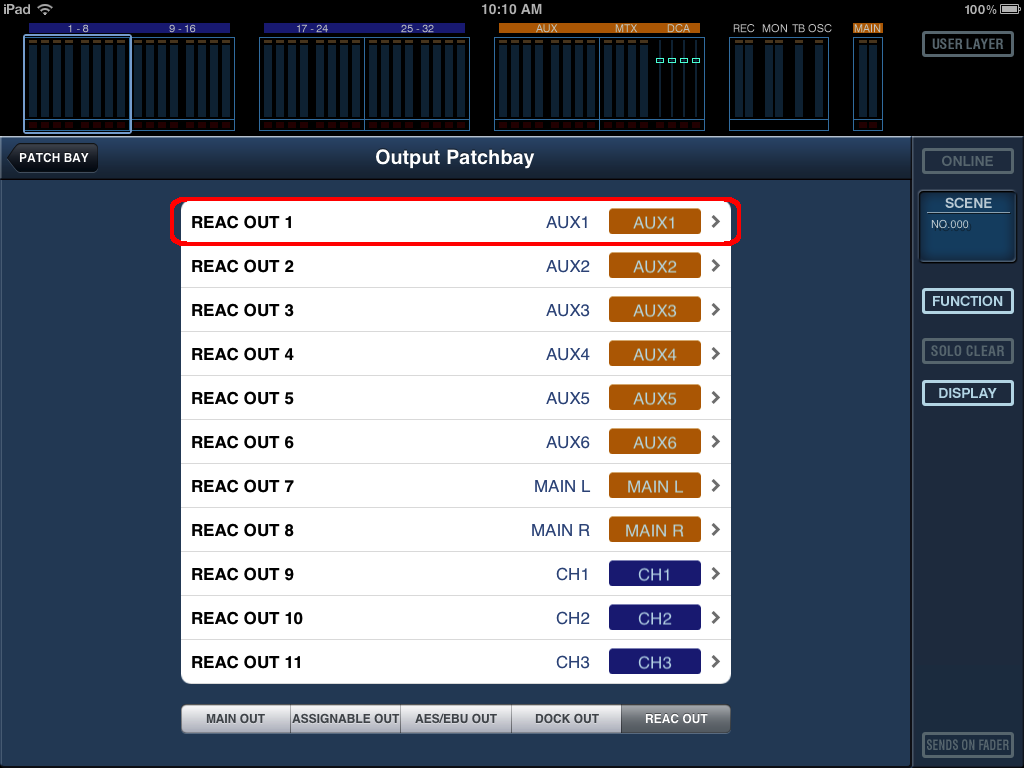
  5. Set REAC OUT 1 to AUX1. This sets up Aux 1 to be patched to output 1 of the connect Roland digital snake.
    IMG_0009_1.png
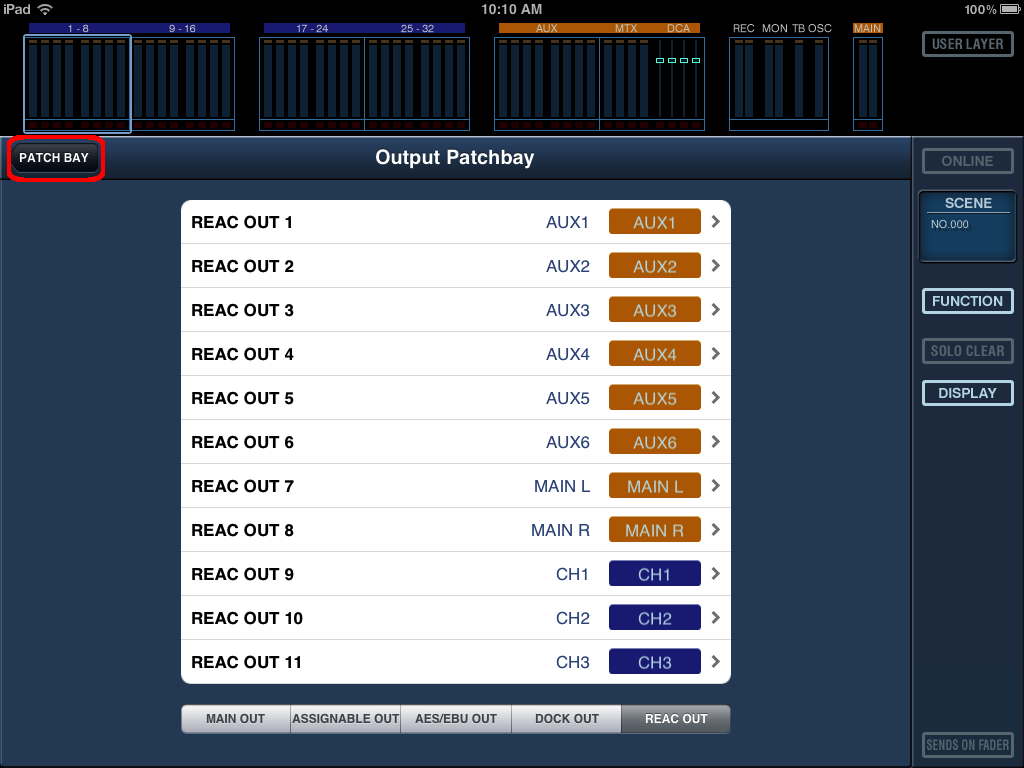
  6. Press the return button repeatedly to return to the main screen.
    IMG_0009_1.png


Sending To An AUX and Bus Setup:

  1. Press the AUX/MTX layer button and then raise the master volume for Aux 1.
    Screen_Shot_2017-08-07_at_10.28.09_AM.png
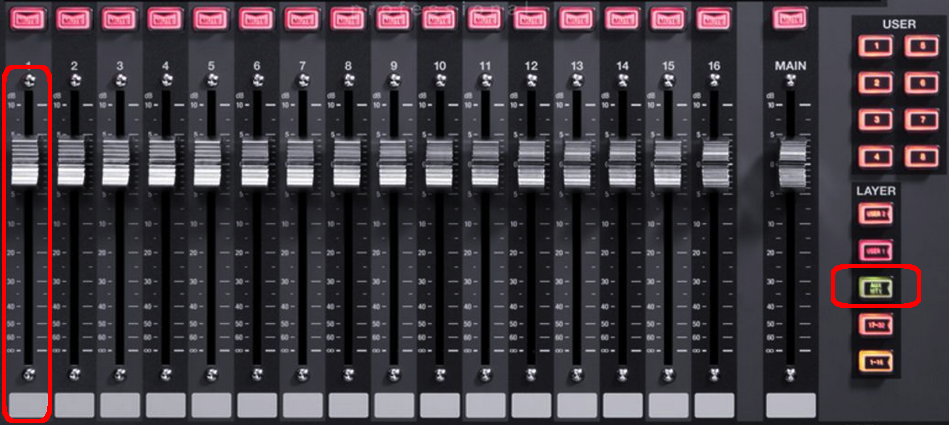
  2. Press AUX 1's MUTE button so that it is NOT illuminated red.
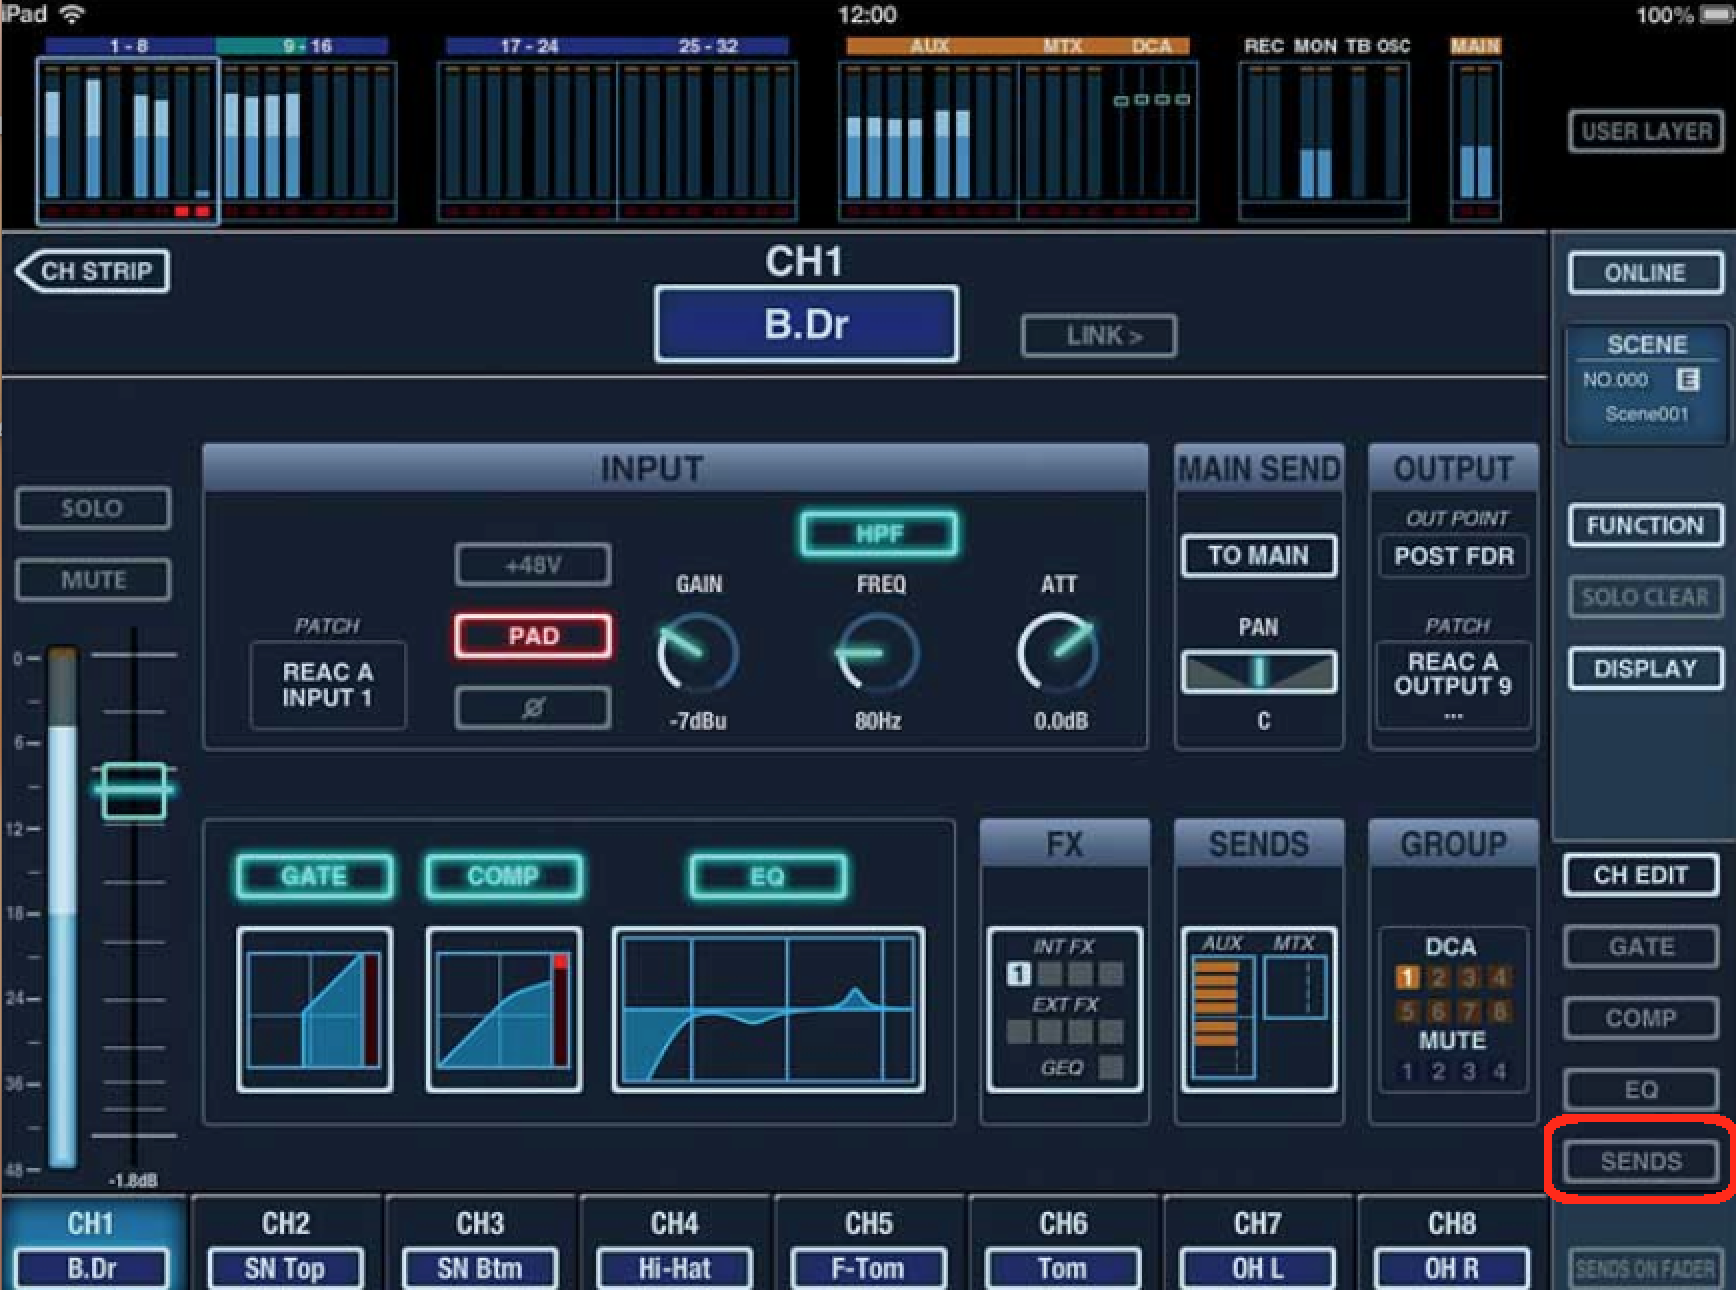
  3. Tap the channel that will be sent to an Aux.
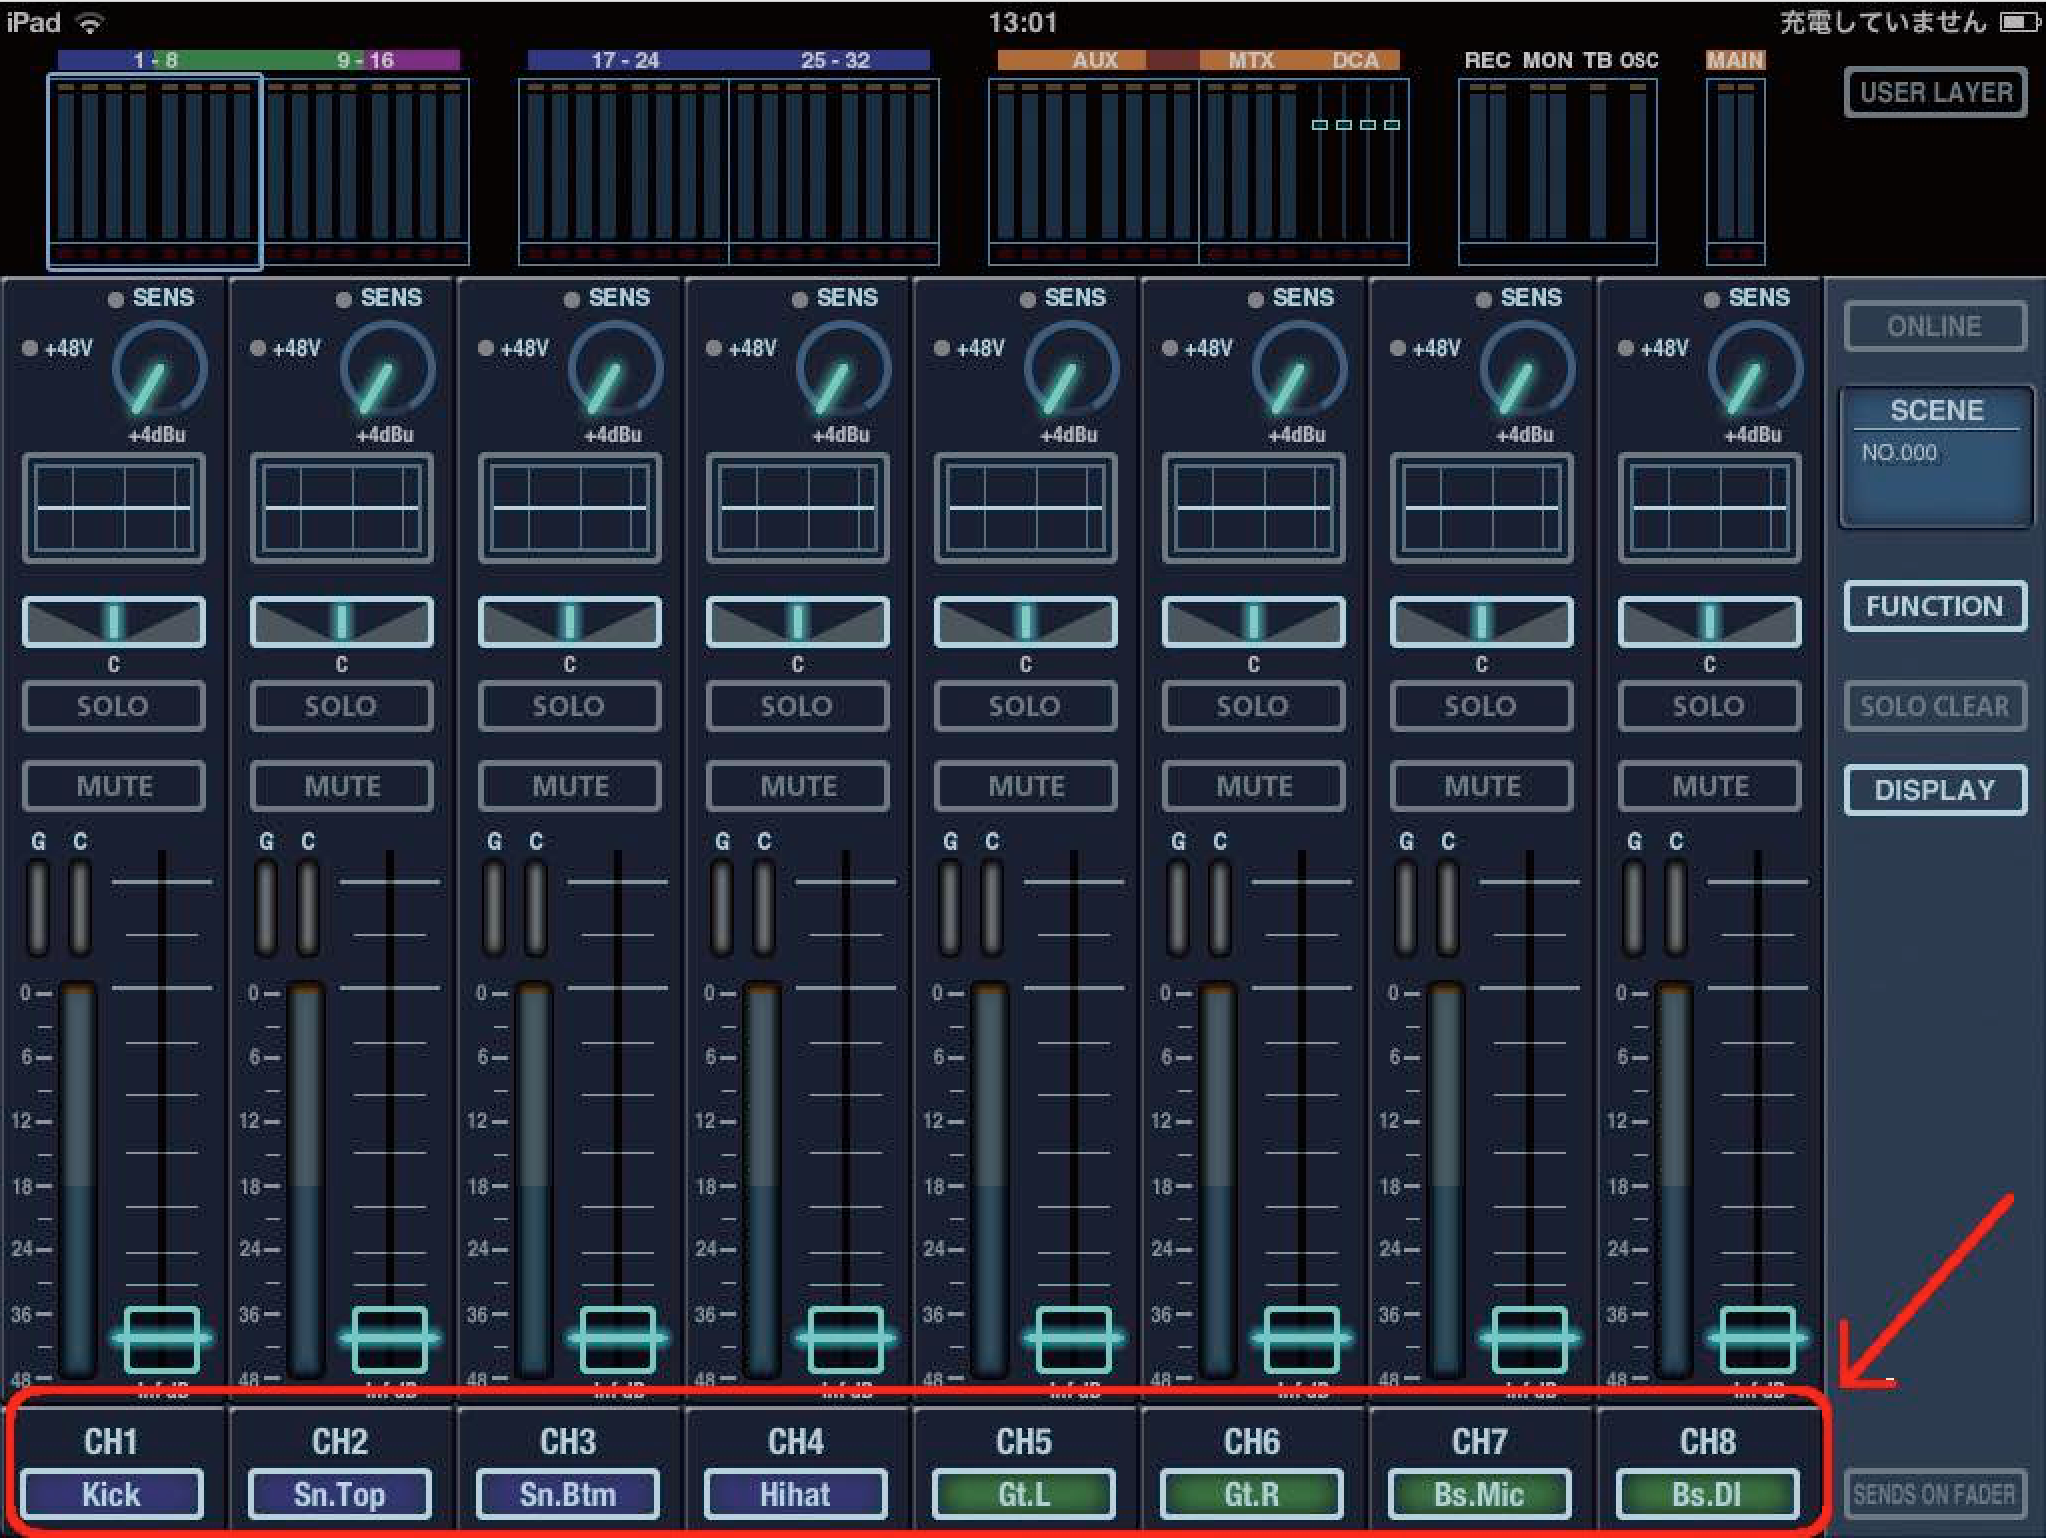
  4. Tap the [SENDS] button towards the right of the screen.
  5. Select the AUX bus send point for this input channel.

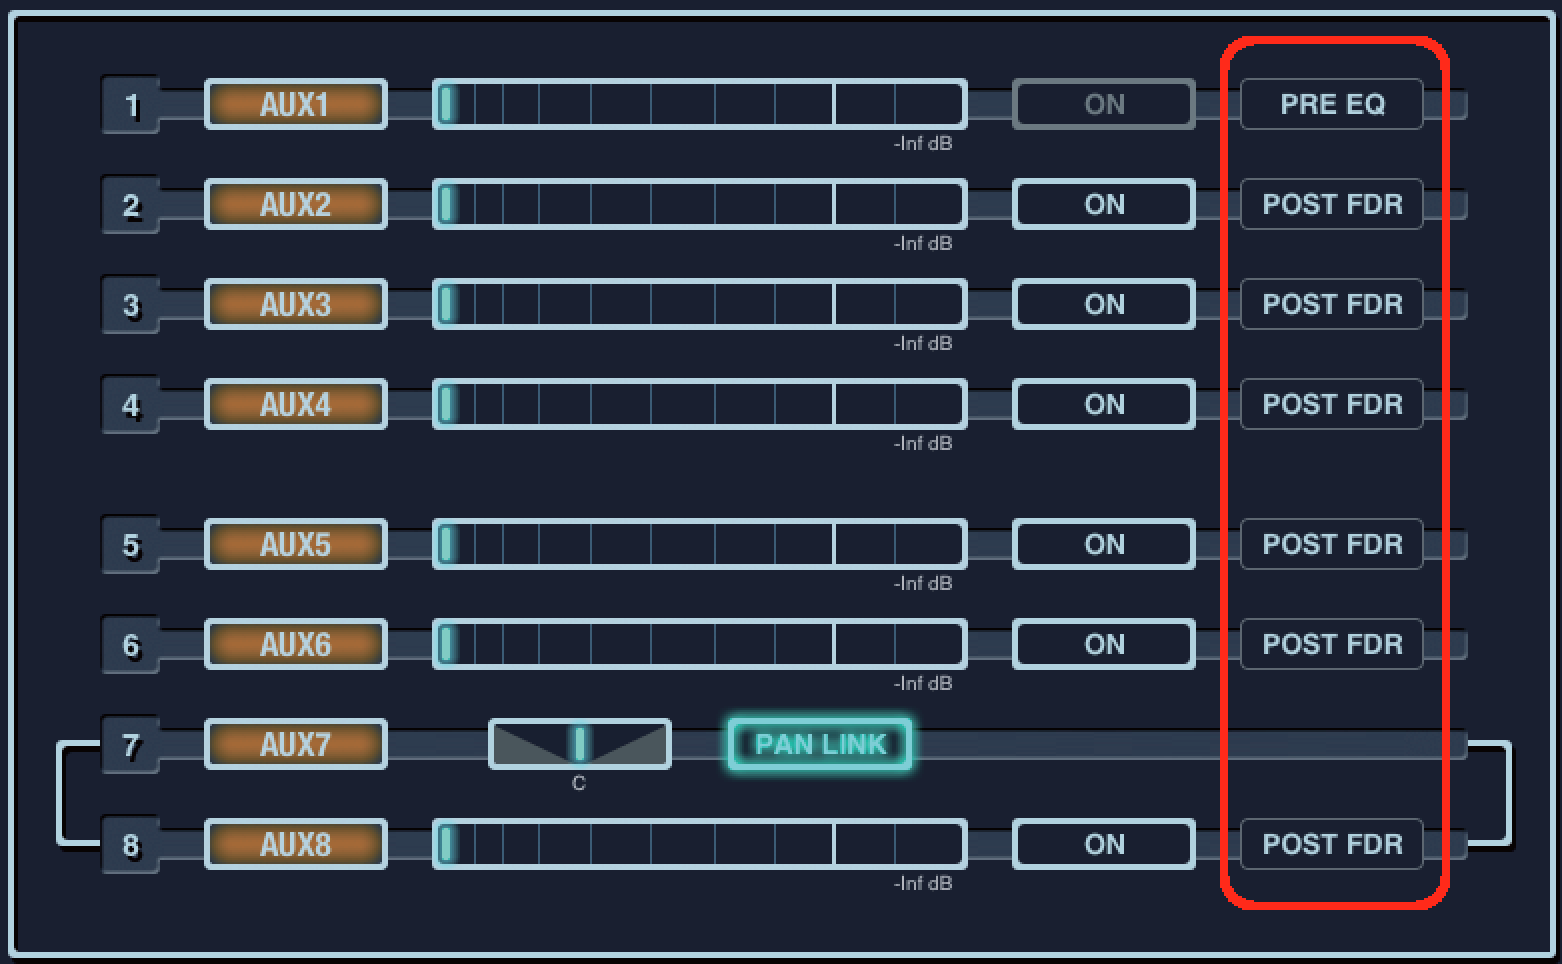
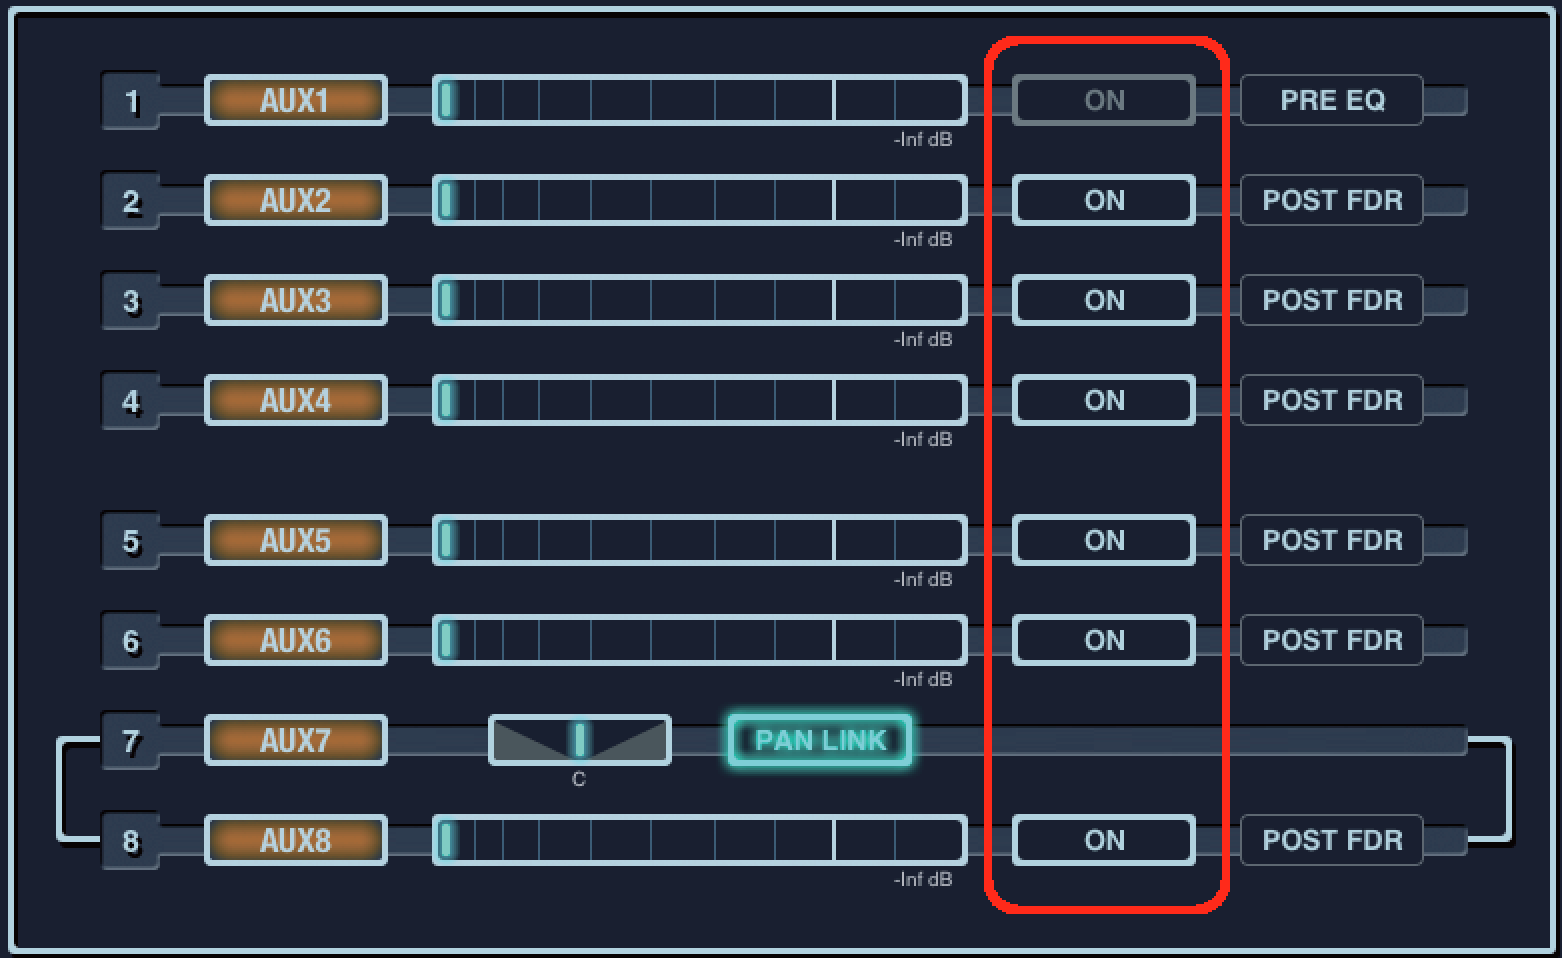
    NOTE: This only sets the send point for the currently selected channel. To set the send point of an Aux for all channels at once, see the "Bus Setup Screen" section below.
  6. Be sure that the AUX bus send is on.
  7. Move the slider with left/right drag operation to set the send level to the desired AUX.


Bus Setup Screen
The following instructions will setup the AUX bus send point for all input channels.

  1. Be sure that the SENDS window is open.
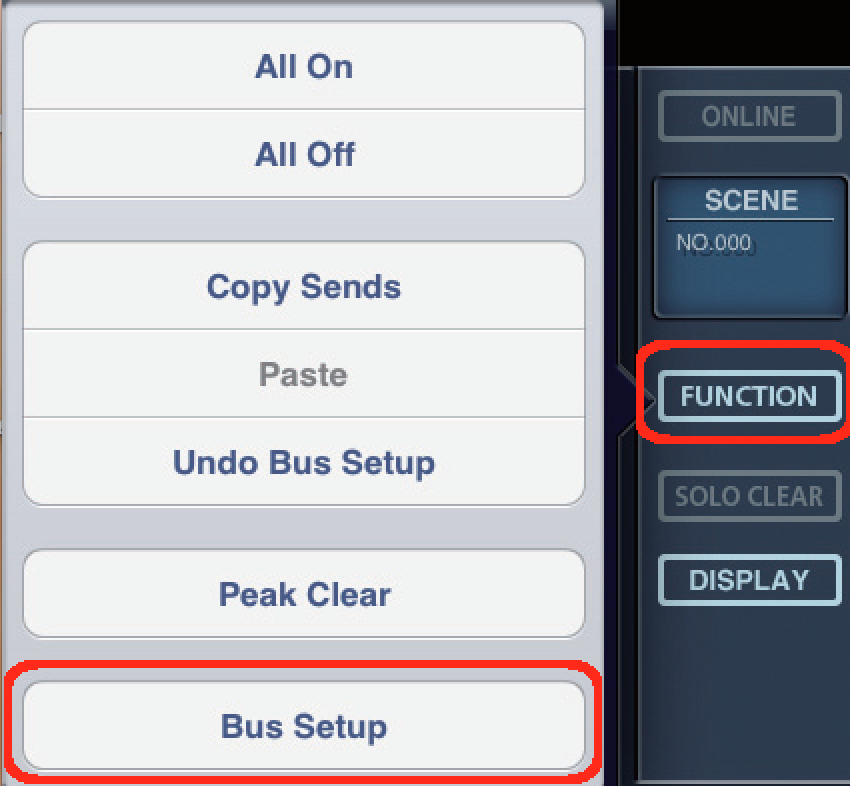
  2. Tap the [FUNCTION] button while the SENDS window is opened and select [Bus Setup].


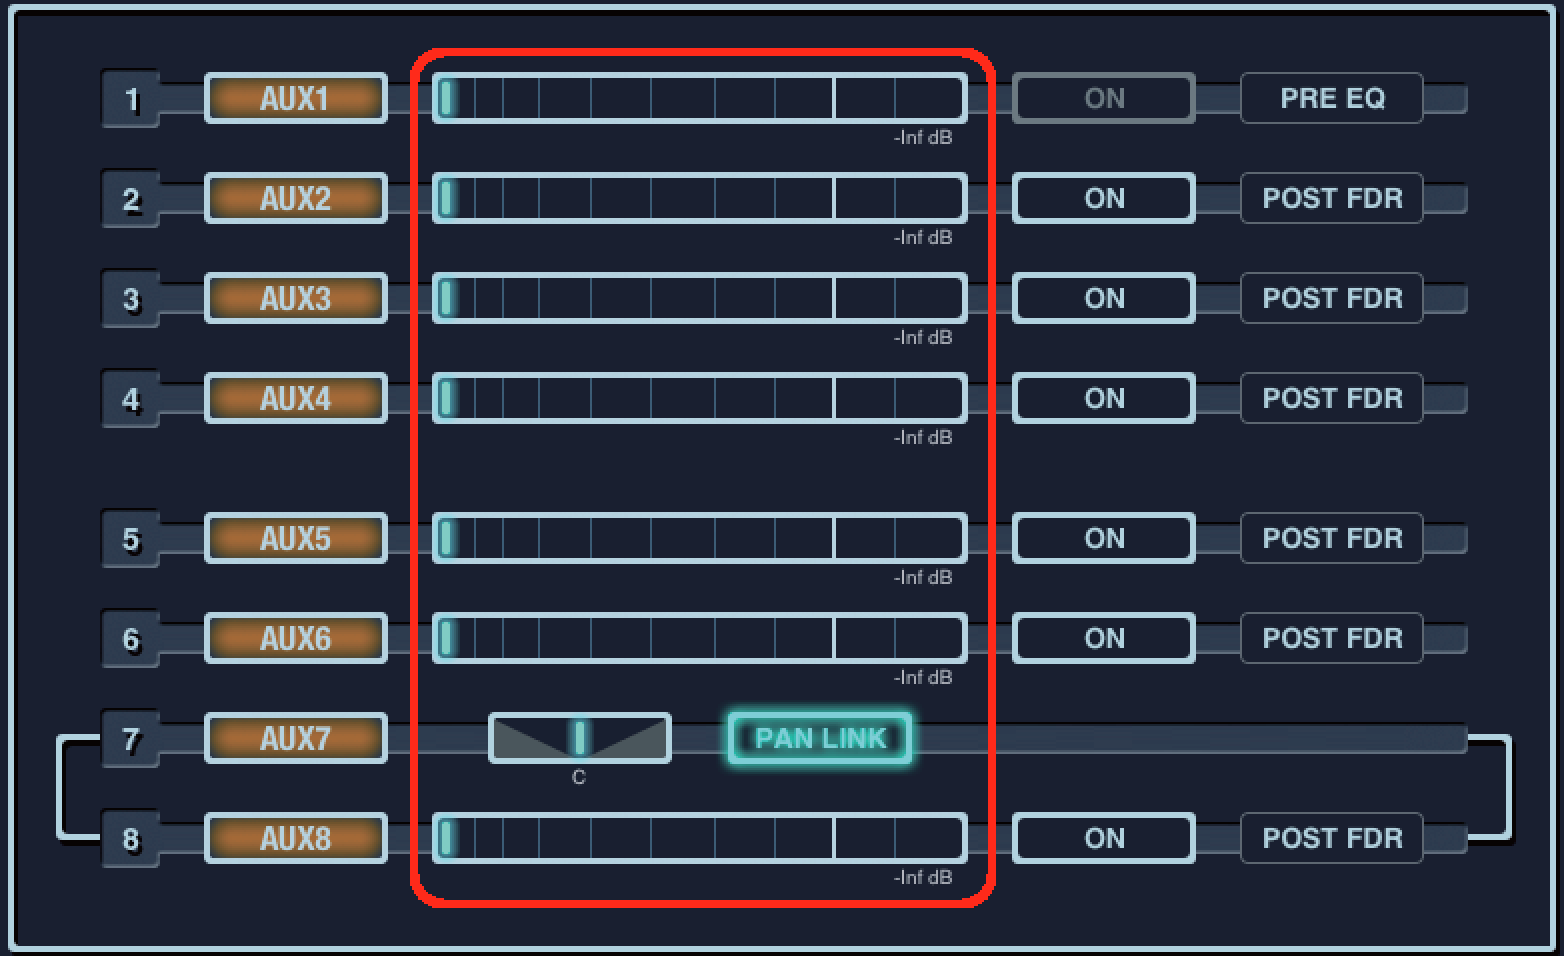
  3. Set the Aux bus send point for an Aux bus (PRE EQ, PRE FDR or POST FDR) and then select [SET] on the top right of the windows.
  4. A confirmation window will appear. Tap [OK].


支持

Quick Links