V-40HD: Enlarging or Reducing Source Picture Function
Here are some steps to help you resize your video source.
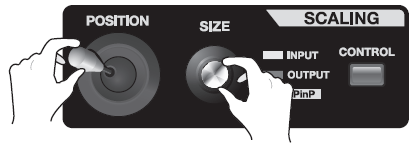
Using the [SIZE] dial in the SCALING section, you can enlarge or reduce the view of the picture. You can also use the [POSITION] joystick to change the display position.
* You can enlarge or reduce the picture within a range of 10% to 1,000%.
Enlarging/Reducing the Source Picture
1. Put the channel of the video you want to enlarge or reduce into standby.
Select the channel of the video you want to enlarge or reduce and put it into standby.
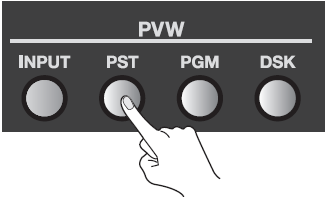
2. Preview the video on the selected channel.
Select the [PST] in PVW selector to display the video on the channel you selected in step 1 on the preview monitor.
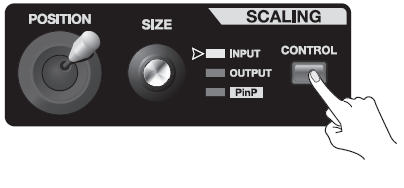
3. Select what to enlarge or reduce.
In the SCALING section, press the [CONTROL] button to make the [INPUT] indicator light up.
4. Perform enlargement or reduction and adjust the display position.
Use the [SIZE] dial to enlarge or reduce the view. Use the [POSITION] joystick to adjust its display position.

You can also enlarge or reduce the picture and adjust its display position by changing the values of [Zoom] and [Position] at the Input menu. At the Input menu, you can also change cropping and the aspect ratio for the picture.
5. Output the enlarged or reduced picture.
Press the [AUTO] button or move the video fader to output the channel of the previewed video.
Enlarging/Reducing the Currently Output Picture
To enlarge or reduce the video currently being output, go to the SCALING section and use the [CONTROL] button to make the [OUTPUT] indicator light up. You can use the same operation to enlarge or reduce the final video output and adjust its display position.
You can also enlarge or reduce the picture and adjust its display position by changing the values of [Zoom] and [Position] at the Output menu. At the Output menu, you can also enlarge or reduce the vertical and horizontal dimensions of the picture independently.
