
V-1SDI: Importing Still Images
The V-1SDI has built-in memory that allows you to temporarily store a still image until the switcher is powered down.
There are a number of ways to import and output stills on the V-1SDI. This guide will cover those methods, including how to quickly change graphics using the free V-1SDI RCS software.
Note: If you are using full-screen graphics, you can set the FREEZE MODE in the menu to STILL, and use the [ FREEZE ] button to output the still, instead of using the [ DSK ] button. |
Capturing Stills from Live Video
If you prefer to capture images from live video, please see the following pages from the Owner's Manual:
RCS Software Setup
Before connecting to the RCS software, check that your V-1SDI system software is up to date. The latest version and update steps are available via the below download link.
Note: The RCS software is required to perform the update.
You can download the latest version of the RCS software here:
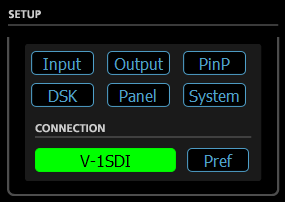
Once the RCS software is open and you are connected, you will be prompted to choose which settings you want to work with. Choose the V-1SDI's settings, otherwise the RCS will overwrite everything with the system defaults.
Portions of this guide is also available on page 11 of the V-1SDI RCS Owner's Manual.
Note: This is a separate document from the V-1SDI Owner's Manual.
Configuring the Freeze Function
For Full-Screen Graphics
-
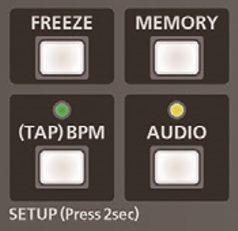
If using the physical menu buttons, press and hold [ SETUP ] for 2 seconds to open the SETUP Menu.
-
Note: This displays the SETUP menu on the monitor connected to the MULTI-VIEW output connector.
-
-
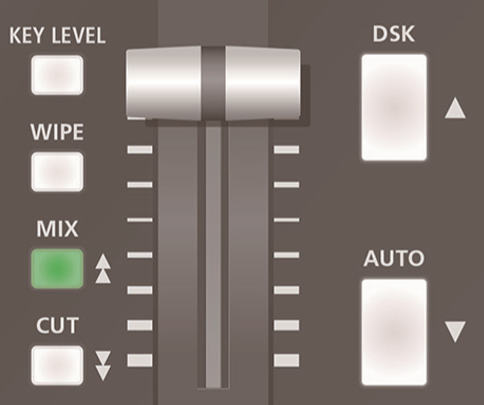
Using the [ AUTO ] button, navigate to Page 14/16.
-
Note: You can use the [ MIX ] and [ CUT ] buttons to quickly navigate menu pages.
-
-
Set the 3rd option, FREEZE MODE.
-
Using the Fader Bar, change the setting to STILL.
-
If using the RCS software, select [ STILL ] from the FREEZE MODE drop-down menu.
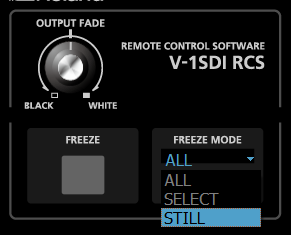
- Now, when you click or press the [ FREEZE ] button, your loaded still with appear on the output.
- If you want to remove the background from the image, please see the next section of this guide.
Configuring the DSK
For Graphics with Transparency
First, setup the DSK in the RCS software.
Note: You can also do this via the V-1SDI's panel buttons and on-screen menu.
- Under SETUP, click the [ DSK ] button.
- In the window that pops up, change the [ SOURCE CH ] from INPUT 4 to STILL.
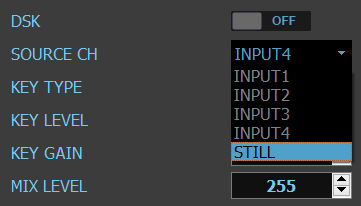
-
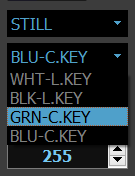
For [ KEY TYPE ], you can choose which color you prefer to key out: BLUE, GREEN, BLACK, or WHITE.
- Note: If your still images use any of the above colors, the key will remove part or all of them from your actual graphics as well.
- Note: If your still images use any of the above colors, the key will remove part or all of them from your actual graphics as well.
- Click [ OK ] to close the DSK sub-menu.
Using the Still Image Editor
- Under Still Image, click the [ EDITOR ] button.

- The default background color automatically adjusts to the color chosen in the DSK settings.
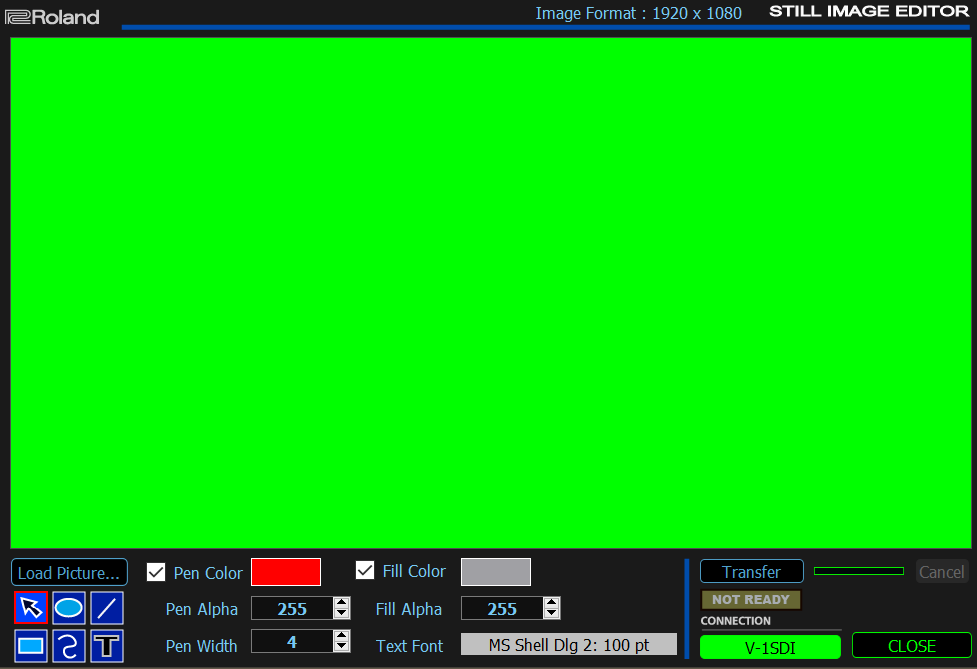
- Once the background color is set, you can then click Load Picture to import an image from a folder on your computer, and resize it after import.
If you have photo editing software that supports transparency with created .GIF and .PNG files, the V-1SDI Still Image Editor will preserve it. This is helpful for importing logos, icons, and lower thirds.
The Still Image Editor also supports multiple layers, so you can compose fairly complex graphics, and save them to your computer's hard drive as .RIZ files.
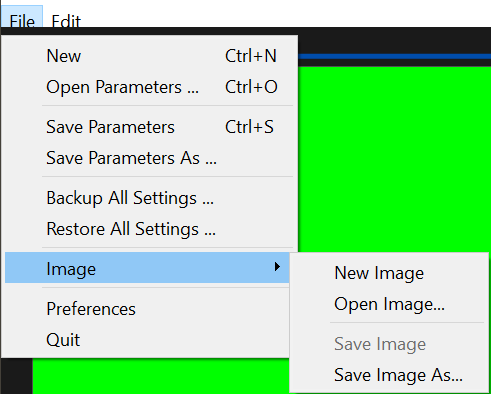
- To save and load images in the Still Image Editor, on the menu bar, click FILE > IMAGE, and choose whether you want to create, open, or save an image.
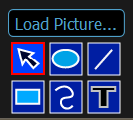
- You can also draw shapes and add text to the editor window, using the tool icons in the lower left corner of the editor window.
- Once you complete your graphic, click the Transfer button and it will send it to the V-1SDI.
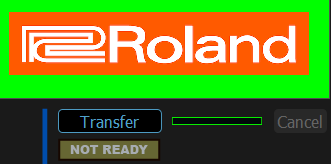
- The transfer time depends on the amount of screen space your graphic takes up. If it is a full-screen photo, it will take longer than a lower-third or logo bug.
Lower Thirds Workflow
For the next section of this guide, we will use the V-1SDI RCS to quickly create a series of lower third titles without resorting to CG (Character Generator) or presentation software.
Our example production is a series of speaker presentations.
- First, create a template for your lower third.
-
It is recommended to create it in photo editing software as a 1920x1080 image with a transparent background, and using the Load Picture function to import it as your base layer.
- Note: If your production is 720P, export the image from the photo editor at 1280x720.
- Next, you can setup the Text Font by clicking on the gray box containing the font settings. The default will say, "MS Shell Dlg 2: 100 pt", or something similar.
-
Then select the Text Tool in the lower left corner of the image editor, and click anywhere in the editor window to create a new text box.
- Note: That the tool will revert to the Selector Tool after you create a text box. To create another text box, click the Text Tool again.
- Note: You can only change the text size using the Text Font sub-menu.
- Note: That the tool will revert to the Selector Tool after you create a text box. To create another text box, click the Text Tool again.
-
Put the name and title of the speaker in the box, position it within your lower third template graphic, and once it's ready, transfer it to the V-1SDI.
- Note: You can also rearrange layers by right-clicking on a layer, and choosing one of the layer positioning options. You can also change the order of selected layers by using keyboard shortcuts:
- Note: You can also rearrange layers by right-clicking on a layer, and choosing one of the layer positioning options. You can also change the order of selected layers by using keyboard shortcuts:
| Bring to Front: | Ctrl+Shift+] |
| Bring Forward: | Ctrl+] |
| Send Backward: | Ctrl+[ |
| Send to Back: | Ctrl+Shift+[ |
- Once complete, you can bring in the graphic overlay by pressing the [ DSK ] button. It will appear over your program output, with the Still Image Editor's background color removed.
-
Once you press the [ DSK ] button again to fade the graphic out on the PGM output, you can open and transfer the next graphic from the .RIZ files stored on your computer.
- Note: You can also change graphics during production by changing the text and/or other layers and transferring again.
- Note: The DSK should be turned off when transferring a graphic, otherwise the new graphic will change like a cut transition.
- Note: You can also change graphics during production by changing the text and/or other layers and transferring again.
- When you are ready to transition in the next graphic, press the [ DSK ] button and the new graphic will appear.
Dedicated CG software solutions may have more features, but they often require that 1 or 2 switcher inputs be dedicated to their live graphics output. Using the RCS Still Image Editor allows you to use all four V-1SDI input channels with other sources.