
VR-120HD: Set Up Your Audio Mix
This guide helps you set up your audio mix on the VR-120HD. It covers inputs, muting unused audio channels, assigning faders, and setting up microphones and external mixers.
Introduction
The VR-120HD has multiple ways to connect audio sources:
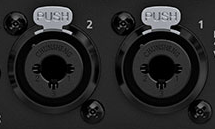
- Analog XLR/TRS - These are combo connectors for 3 pin XLR cables and 1/4" audio cables
- Analog RCA - These are red and white phono connectors
- Digital HDMI/SDI - The video inputs support embedded audio in the video signal
- Digital USB-C - This connector supports both audio input and output
- Digital Bluetooth - You can also pair a device and send audio to the VR-120HD
This guide covers 2 workflows:
- Using the VR-120HD to mix all of your audio
- Using an external audio mixer with stereo or mono output to the VR-120HD
Muting Audio Channels
The first thing you want to do when setting up a VR-120HD is to mute any audio channels you do not plan to use. In most cases, this is some or all of the HDMI or SDI inputs.
When you go to the Audio Input menu, the HDMI and SDI settings are listed last:
- Audio In 1 - 6 are for the XLR/TRS
- Audio In 7/8 and 9/10 are for the RCA inputs
- USB In is for the incoming USB audio
- Bluetooth In is for the incoming Bluetooth audio
- Audio Player and V.Player are for the audio and video players
- HDMI In 1 through HDMI In 6 is for the HDMI inputs
- SDI In 1 through SDI In 6 is for the SDI inputs
Press the Audio Level button to access groups of channel strips.
Select the group from the tabs along the top of the screen and mute the channels there. If you plan to output a camera's microphone or laptop's audio via HDMI or SDI to the VR-120HD, do not mute that HDMI or SDI input.
Even if your HDMI or SDI source does not output any audio, it is recommended to mute that audio channel, because in some cases, the source may generate noise that will be part of your audio mix.
Muting unused analog input channels is not necessary, so long as the gain knob and level fader are turned all the way down for those channels.
- Fader - The channels currently assigned to the physical faders.
- Audio In - The analog audio inputs.
- Other - The USB and Bluetooth inputs, and the audio and video player.
- HDMI In - The embedded audio on HDMI inputs.
- SDI In - The embedded audio on HDMI inputs.
- Audio Out - The audio output buses (Main, AUX 1, AUX 2, USB Out, Stream/Record).
- Custom - Additional bank of channels that you can assign.
You can also set up Audio Follows Video, which unmutes an HDMI source when it is visible on PGM.
More information is on page 43 of the Reference Manual.
Assigning Faders
The VR-120HD can assign any audio source to any of the physical faders on the console. There are two ways to do this.
Press the Setup button for the fader you want to reassign, and tap the blue text at the top to change it.
Or press the Audio Level button, check that you are on the Fader tab, and tap the blue text along the bottom of each channel to change it.
We will use the default fader assignments in this guide.
Microphone Setup
This section covers microphones that are connected directly to the VR-120HD mic inputs. If you are using an external audio mixer, you can skip to the next section.
To set up a microphone, first you need to determine what type it is:
-
Dynamic
- These microphones need a lot of head amp (aka preamp) gain
- They do not need phantom power
-
Condenser
- These microphones need less head amp gain
- They are more sensitive to noises in the room
- They need phantom power
-
Lavalier
- These are clip on microphones
- The amount of head amp gain needed varies
- Wired
- These need less head amp gain
- Can be very sensitive to room and clothing noises
- They also need phantom power
- Wireless
- Head amp gain varies, because the level is also controlled via the mic belt packs
- In most cases, they do not need phantom power
- Wired
In this example, we connected a dynamic microphone to Audio In 1, and a condenser microphone to Audio In 2.
Turn up the faders for Audio In 1, Audio In 2, and MAIN on the VR-120HD to the "0" mark.
Press the Setup button for Audio In 2 and tap the Phantom +48V switch on the screen.
Turn up the Gain knob for each mic channel until you get a good sounding level, and the SIG/PEAK LED above the Gain knobs are between Green and Yellow, but not Red. This setting will vary based on the microphone and the voice of the person using it.
Here are examples of the two different types of microphones:
-
Dynamic Microphone
- Audio In 1 > Head Amp Gain > 50 dB
- Audio In 1 > Digital Gain > 0.0 dB
- Audio In 1 > Input Level > 0.0 dB
-
Audio In 1 > Pan > Center
-
Condenser Microphone
- Audio In 2 > Head Amp Gain > 35 dB
- Audio In 2 > Digital Gain > 0.0 dB
- Audio In 2 > Input Level > 0.0 dB
- Audio In 2 > Pan > Center
As a general rule, do not pan microphones that people are speaking into, your dialogue should be centered.
Also, do not adjust the Digital Gain setting, it's a pre-fader trim to adjust the level before any EQ or Compressor processing. More info is in the Reference Manual.
If you have a digital audio source that you want to center in the mix, like a microphone connected to a camera, the camera may pan audio inputs left and right. You can center it in the VR-120HD by using the Mono setting.
- L Only - Centers the left channel and mutes the right channel
- R Only - Centers the right channel and mutes the left channel
- LR Mix - Combines and centers both the left and right channels
External Audio Mixer Setup
Balanced Cables
Balanced cables require balanced connectors and wiring on each end.
- XLR and 1/4" TRS connectors are balanced.
- TRS cables are very similar to TS cables, which are unbalanced.
Connect your external audio mixer's left and right outputs to XLR/TRS inputs Audio In 1 and Audio In 2 on the VR-120HD.
Press the Setup button for Audio In 1 and tap the Stereo Link switch on the screen. Audio In 1 and Audio In 2 are now both controlled by Input Fader 1 and panned left and right. You can reassign Input Fader 2 to whatever you want.
If your external mixer is a single mono output, leave Stereo Link off and set Pan to Center.
Turn up the faders for Audio In 1 and MAIN on the VR-120HD to the "0" mark.
Finally, output a test tone from your external audio mixer to calibrate the signal level. You may need to add a small amount of gain using the Gain knob (or Analog Gain setting) to get the signal level to match.
If you are not familiar with calibrating audio levels, you can skip this step, as the mix level will already be very close.
The stereo meters are measured in dBFS, a digital scale where the highest value is 0dB, and anything over that is clipping. This is not the same as a VU meter.
If you output a 1 kHz sine wave test tone at a +4 dBu reference level, it should appear as -16 dBFS on the Roland switcher, and 0 dBu reference would be -20 dBFS.
- dBu, VU, and dBFS are all different scales, so any measurement is different between each of them.
There are meters on the VR-120HD panel for the main mix, and the LCD screen for each input and output channel. If you want a more detailed meter, use the touchscreen.
RCA Line Inputs
You can instead connect an audio mixer's RCA outputs to Audio In 7/8 on the VR-120HD.
Slide the fader for Audio In 7/8 and Main to the "0" mark.
RCA Cable Length
If you need to run a long cable between the audio mixer and video switcher, use XLR or TRS cables for a balanced connection to avoid noise in the signal.
If your mixer only has RCA outputs, connect a short RCA cable to a line converter box, it converts the output to XLR, which gives you a balanced connection that you can run a long distance to the Roland Switcher.
Additional Tips
Create A Settings Backup File
Once you have your final audio settings, it's recommended to create a backup file. This can be done saving a file to a USB flash drive using the VR-120HD menu.
More information is on page 84 in the Reference Manual.
Allow Scenes to Change Audio Settings
When you store a scene memory, your current audio settings are written to it. But they will not be recalled, by default. It's not recommended to change this, but if you want scenes to recall audio settings, adjust one or more of the following menu settings.
- Menu > Scene Memory > Load Parameter - Audio Fader Assign > On
- Menu > Scene Memory > Load Parameter - Audio Input > On
- Menu > Scene Memory > Load Parameter - Audio Output > On
- Menu > Scene Memory > Load Parameter - Audio Follow > On
- Menu > Scene Memory > Load Parameter - Audio Auto Mixing > On
More information is on page 68 in the Reference Manual.
Enable Panel Lock for Audio Knobs
If you have a number of people operating the VR-120HD, it can help to enable Panel Lock. This is a feature disables specific knobs and buttons on the VR-120HD.
If a button, knob, or slider is locked, the menu button will flash when you try to use it. Here is an example that locks the audio inputs and outputs when using an external mixer.
- Menu > System > Panel Lock > Audio Mixer 1 - Gain Knob > On
- Menu > System > Panel Lock > Audio Mixer 1 - Mute Button > On
- Menu > System > Panel Lock > Audio Mixer 1 - Level Fader > On
- Menu > System > Panel Lock > Audio Mixer 2 - Gain Knob > On
- Menu > System > Panel Lock > Audio Mixer 2 - Mute Button > On
- Menu > System > Panel Lock > Audio Mixer 2 - Level Fader > On
- Menu > System > Panel Lock > Main - Mute Button > On
- Menu > System > Panel Lock > Main - Level Fader > On
More information is on page 80 in the Reference Manual.